When managing a WordPress website, your top priority should be to make sure you are backing up the site regularly. Without backups you have no way of restoring your site should something go wrong. In this post, I’m going to go through how you use my favourite backup plugin, UpdraftPlus, to backup your WordPress website.
What is UpdraftPlus?
UpdraftPlus is a very popular backup plugin which has been installed and is running on over 1 million WordPress websites. Like many plugins, UpdraftPlus has a free version and a premium version.
The free version has everything you need to take regular backups of your site. It will allow you to set a backup schedule, take one-off manual backups, and send those backups to a remote storage service such as dropbox.
The premium version has some additional features that can make life easier. Premium features include automatic backups when you apply updates, extra scheduling options, and a website cloning tool. If you are one of my WordPress Care Plan clients, you will get one of my Updraft Plus premium licences.
Installing UpdraftPlus
Installation is straight forward. You can find the free version of the plugin on wordpress.org and through the plugins section of your WordPress dashboard. If you have the premium version, you will need to download it from the UpdraftPlus website.
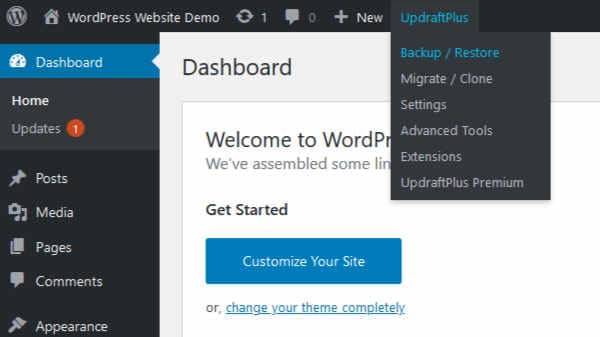
There is no technical configuration needed to get you started beyond activating the plugin. However, you will need to register the premium plugin to access the premium features. Activating the plugin will add an UpdraftPlus drop-down menu to the WordPress Admin Bar. You can also get to it via the settings menu.
Creating a backup
UpdraftPlus is straight forward to use. Hovering over the UpdraftPlus menu item in the admin bar should open up a list of options. Most of the time, you will just be concerned with the Backup/Restore screen.
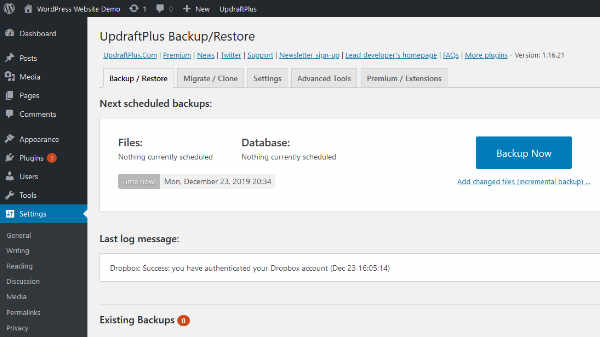
The Backup/Restore screen is where you can create and restore backups. Clicking the big blue “Backup Now” button and following the prompts will start the backup process.
UpdraftPlus will create a series of archive files for the different parts of your site included in the backup. Plugins will be in one archive file while your themes will be in another. If you have a lot of uploads, it may split them into several archive files. The time it takes for the backup to complete will depend on the size of your site. The performance of your hosting will also have an impact on how long it takes to create and restore a backup.
Restoring a backup
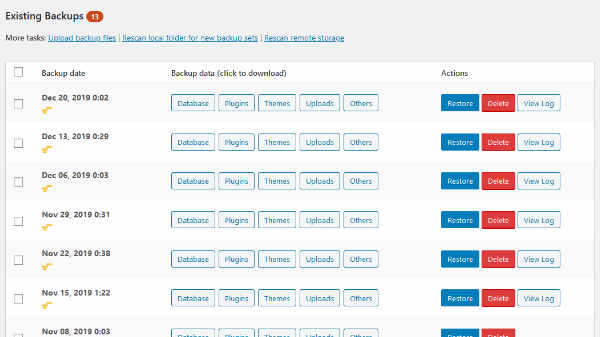
Just below the section where you create a new backup, you will find a list of existing backups, and the option to restore them. You can either restore the specific part of the archive you need, such as just the plugins folder, or the whole backup which will restore everything.
When restoring a backup, before UpdraftPlus overwrites any data, it saves it in a specific folder marked “old”. Once you are happy that you don’t need that data anymore, you can delete it.
Setting up a backup schedule.
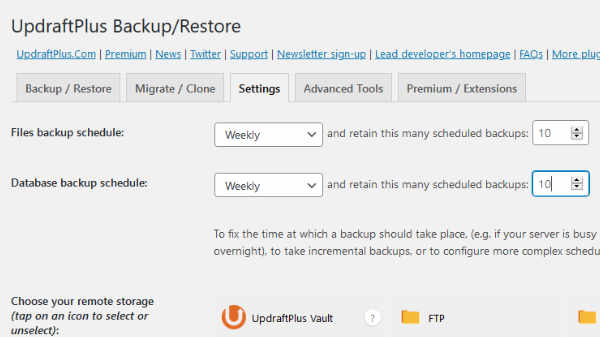
Creating backups as and when you need them is a start, but scheduling regular backups to happen automatically is far better. The UpdraftPlus settings screen allows you to specify how often you want to back up your files and database. How often you should back up your site will depend on how frequently the site is updated.
The free version of UpdraftPlus allows you to specify the period between backups. The premium version of UpdraftPlus gives you more options to control when your backups run.
You will also need to specify how many recent backups should be kept. The ideal number will depend on your specific needs. How much available space you have to store backups will be your primary consideration.
When setting up an automated backup schedule, it is worth also turning on the email reporting. Email reporting will send a basic report about your backups to your sites admin email.
Adding remote storage
By default, UpdraftPlus stores the backups on the same server as your website. As well as taking up space on your hosting plan, it is also not great to keep your backup in the same place as the site. I would highly recommend connecting UpdraftPlus to a file storage service, like Dropbox, Google Drive, or Amazon S3. If you are one of my Care Plan clients, I will provide remote storage for you.
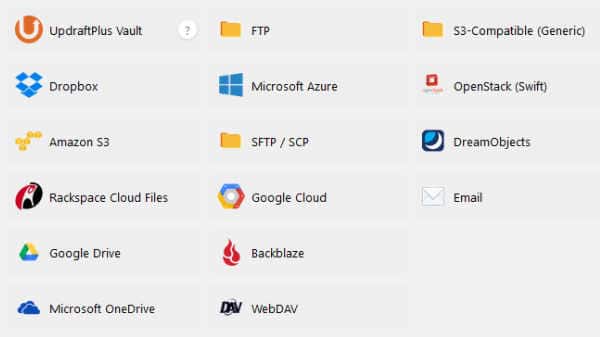
Connecting UpdraftPlus to Dropbox or Google Drive
Connecting your UpdraftPlus plugin to Dropbox or Google Drive will be a familiar process if you have connected different apps before. You will need to login to the relevant account you want to use to store your backups before you start. (The premium version of UpdraftPlus also includes the option to use Microsoft OneDrive for remote storage, as well as the ability to use multiple remote storage options at the same time.)
In the settings screen of UpdraftPlus, you need to select remote storage option you would like to use, then scroll to the bottom and click save. You will be shown a popup box with a link to authenticate UpdraftPlus with the file storage service you selected. Once you give UpdraftPlus the relevant permission, you will be presented with a final confirmation screen from UpdraftPlus. Clicking the “Complete Setup” button will finish the process.
The free version of the plugin will save the backups in a specific folder (“apps/UpdraftPlus” for dropbox and “UpdraftPlus” for Google Drive). If you have the premium version of the plugin, you can specify a different folder to use.
Connecting UpdraftPlus to Amazon S3
If you use any of Amazons Web Sevices, you may want to use their S3 file storage to store your backups. Connecting UpdraftPlus to Amazon S3 is a little more technical. You will need to create a suitable S3 bucket to use, and a user with the relevant permissions to access that bucket. You will then need to get the relevant API keys for that user so UpdraftPlus can use them to send and retrieve data.
Checking your backups
As with any backup solution, it is essential to check that it is working. The premium version of UpdraftPlus has a tool to send backups to other sites, such as a staging or testing site. If you have to test your backups by restoring to your live site, make sure you have an additional backup solution in place should anything go wrong. I generally recommend having more than one backup solution in place anyway. Most hosting providers will have a suitable backup system that you can also use.

